
A Parcel of Time - technique
This piece is much longer than usual, but then it’s basically a mini training course: how to get a handle on many hours of interviews to make a film – or a book, or radio documentary, come to that.
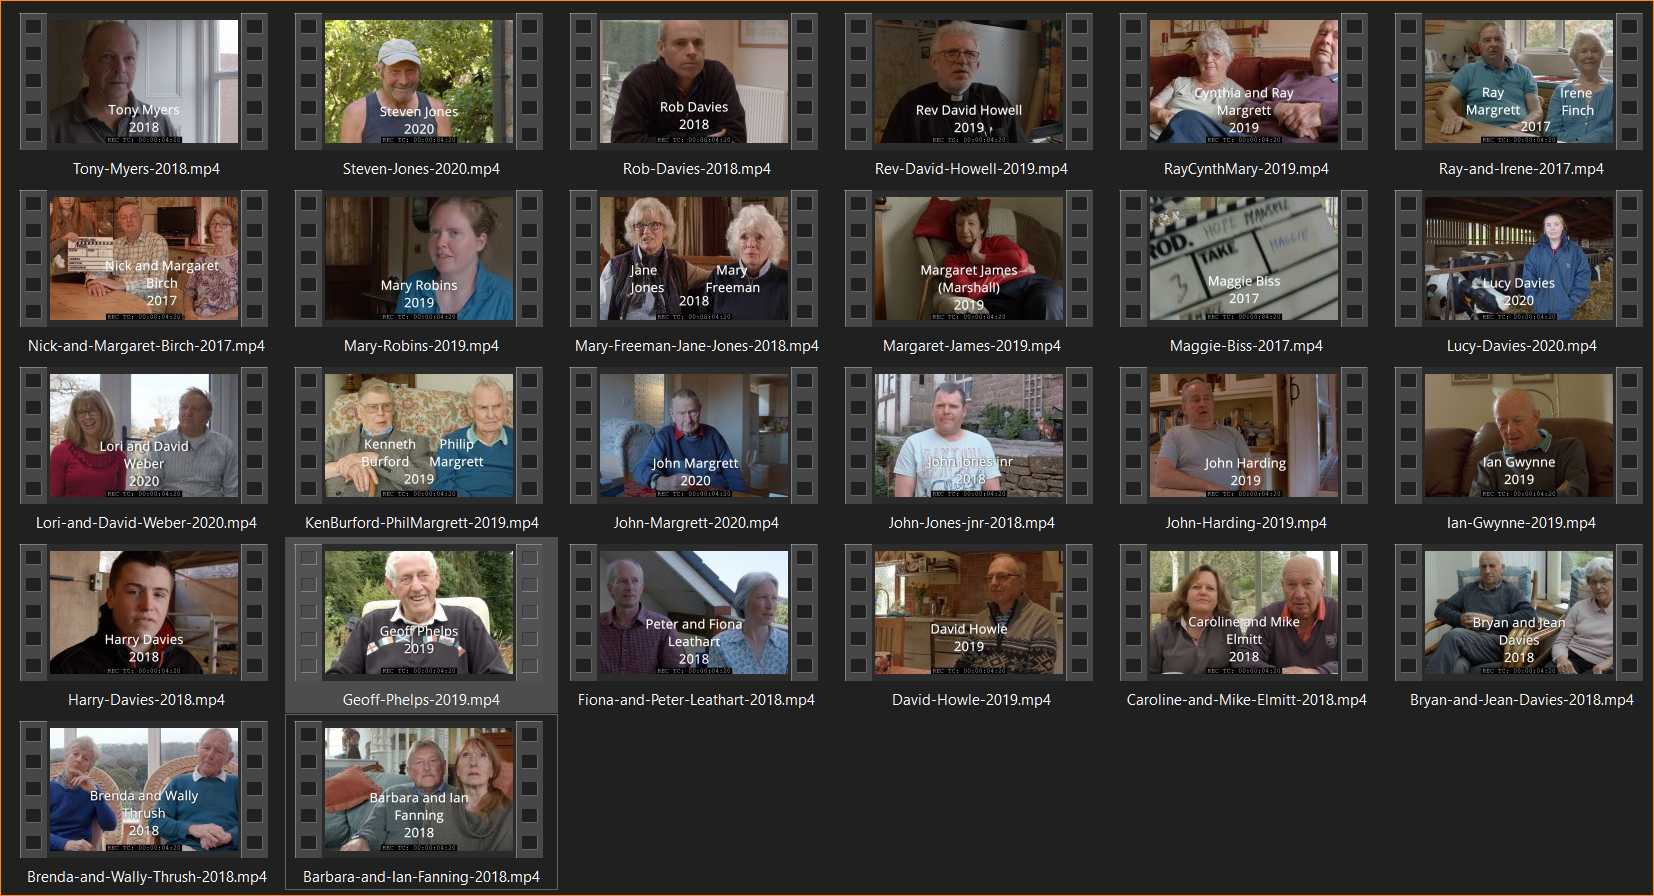
As you may know, I have recently completed a feature-length documentary, A Parcel of Time. It’s the story of a Herefordshire village, but it’s also the story of change in all villages in England. A trailer and details of how to see the film are on the website: www.hopemansellhistory.uk, as are the unedited interviews.
There are two opposite ways of making a documentary. The first, and more traditional, is to have no fixed idea of a narrative before you start and to film real people and real lives to find out what’s there. The other way, of course, is to have your story ready before you start filming and to fit everything into a pre-constructed framework. That way is a lot easier to do, but it’s also a lot less like life, or truth. In “A Parcel of Time”, I took the first approach. I had some general expectations, but no real idea of what I would find.
I filmed the first interviews in 2017, and the last one during the Covid lull, almost exactly three years later. To give you an idea of the numbers, the completed film is just under ninety minutes long. In total, I filmed around 26 hours of interviews and another 25 hours of events, activity, and scenery. A shooting ratio of around 34:1 is not at all unusual for a documentary. In fact, it’s quite modest for a project of this nature. But it takes a certain technique to find a film in the mountain of material.
This is a step by step guide to the technique that I use. It’s one that I learned a long time ago when I worked on a thirteen-part tv series which was also based around extended interviews. You might have other methods, but this has worked for me over the years.
Transcripts
First of all, you need printed transcripts. Yes, paper. There’s no way you’ll get a grip on what everyone is saying by listening to it, no matter how many times. In fact, until the last stage, you don’t need to listen to the interviews at all. And I don’t think you can do it by reading on screen, either, because you’re limited in the amount you can see at once – but maybe some people can manage it. (For transcripts, I can really recommend www.otter.ai. I’ve been experimenting with machine-transcription for probably 15 years, and theirs is the first service I’ve found that is quicker than typing it yourself.)
So here’s a walk through the way I do it:
- read all the way through the transcripts once and try to get a feel for what each person is talking about.
- read through them again and mark interesting passages or sound bites in the margin
- read through bits you’ve marked, and put a box around the exact sound bite you think you might put in a film.
- read through them again and number your boxes, I suggest with a code that tells you who the speaker is – so Fred Blogs will have extracts numbered FB1, FB2 and so on.
- glance through everything again to make sure you haven’t missed anything.
- make a log of your numbered clips with a phrase describing each one. FB1 Fred and the swan
Narrative
By this time you’ll be pretty familiar with the material you have, and an overall narrative line might well be developing. So now you can begin to structure the story.
Of course, particularly with this kind of material, there are many ways of using and cutting the material to make a film. This degree of familiarity with the material means that something that feels important to you will float to the surface, and you can go from there.
- For this film I made two lists. One was a simple log of each sound bite, listed by speaker. The other was a list of the soundbites by subject area: farming, dogs, death, and so on.
- Then I started constructing the film – a paper edit of the sound bites I wanted in a running order that tells a story – or at least has a flow and a logic to it. At this stage, if in doubt, put it in. So our running order looks something like: FB6, JC2, FB3, VG9
Film editing
- And now, at last, we turn to the film edit, and make an assembly of the chosen clips in the running order assembled on paper.
- You’ll almost certainly find it’s too long. You’ll also find that some clips don’t go together the way you hoped. But now you will have an assembled story, which you can trim, break up with action and music, basically turn into a film.
If you don’t assemble a skeleton framework on paper like this, the whole edit process will take you a lot longer – and you may miss out some of the best material. For much shorter films, I do a similar thing, but sometimes only work from notes I take while listening to recorded interviews – if they’re simple enough – rather than full transcripts.